
Building a macOS app with Rubymotion - Part 1: Getting started with Rubymotion
An article on getting started with macOS development with RubyMotion. It shows you how to initialize your first project and translate between Objective-C and RubyMotion.
This article is part of a series with the following topics (if there is no link provided the articles will be published at a future date):
- Getting started with Rubymotion
- Building a basic GUI
- Writing tests
- Building a NSTableView GUI in Rubymotion
- Using gems and Cocoapods
- Vendoring C libraries with Rubymotion
Initializing a project
Before we start with our first project you will need to download and install Rubymotion from here. The download is a zipped installer. Unzip it and double click to install. Also make sure that you have got the current version of XCode installed as described here. Lastly you will need to have a text editor installed on your computer. My personal choice is TextMate which you can download and use for free.
After installation is complete open the Terminal application. Let’s start by creating a new project:
$ mkdir ~/Documents/rubymotion-dev
$ cd ~/Documents/rubymotion-dev
$ motion create --template=osx HelloRM
This will output something like:
[!] You may want to run `motion repo` if it's been a while since you've updated templates.
    Create HelloRM
    Create HelloRM/.gitignore
    Create HelloRM/Gemfile
    Create HelloRM/README.md
    Create HelloRM/Rakefile
    Create HelloRM/app/app_delegate.rb
    Create HelloRM/app/menu.rb
    Create HelloRM/resources/Assets.xcassets/AppIcon.appiconset/1024x1024.png
    Create HelloRM/resources/Assets.xcassets/AppIcon.appiconset/Contents.json
    Create HelloRM/resources/Assets.xcassets/AppIcon.appiconset/Icon_128x128.png
    Create HelloRM/resources/Assets.xcassets/AppIcon.appiconset/Icon_128x128@2x.png
    Create HelloRM/resources/Assets.xcassets/AppIcon.appiconset/Icon_16x16.png
    Create HelloRM/resources/Assets.xcassets/AppIcon.appiconset/Icon_16x16@2x.png
    Create HelloRM/resources/Assets.xcassets/AppIcon.appiconset/Icon_256x256.png
    Create HelloRM/resources/Assets.xcassets/AppIcon.appiconset/Icon_256x256@2x.png
    Create HelloRM/resources/Assets.xcassets/AppIcon.appiconset/Icon_32x32.png
    Create HelloRM/resources/Assets.xcassets/AppIcon.appiconset/Icon_32x32@2x.png
    Create HelloRM/resources/Assets.xcassets/AppIcon.appiconset/Icon_512x512.png
    Create HelloRM/resources/Assets.xcassets/AppIcon.appiconset/Icon_512x512@2x.png
    Create HelloRM/resources/Assets.xcassets/Contents.json
    Create HelloRM/resources/Credits.rtf
    Create HelloRM/spec/main_spec.rb
Working with the terminal
When you are working with Rubymotion you will have to be familiar with the Terminal. If you are not, you will find lots of tutorials on the web to get you started:
Run our app for the first time
Before we analyze the project folder a little bit more, we are going to build and run the app for the first time:
$ bundle        # install dependencies
$ rake          # rake means: build and run our application
This should give you some output on the command line and the our new app will show up with a menu bar and a window:

Hooray you have just built your first macOS application! Now let’s take a closer look at our project folder…
The project folder
After setting up your Rubymotion project your project folder will look like this
├── Gemfile
├── README.md
├── Rakefile
├── app
│   ├── app_delegate.rb
│   └── menu.rb
├── resources
│   ├── Assets.xcassets
│   │   ├── AppIcon.appiconset
│   │   │   ├── 1024x1024.png
│   │   │   ├── Contents.json
│   │   │   ├── Icon_128x128.png
│   │   │   ├── Icon_128x128@2x.png
│   │   │   ├── Icon_16x16.png
│   │   │   ├── Icon_16x16@2x.png
│   │   │   ├── Icon_256x256.png
│   │   │   ├── Icon_256x256@2x.png
│   │   │   ├── Icon_32x32.png
│   │   │   ├── Icon_32x32@2x.png
│   │   │   ├── Icon_512x512.png
│   │   │   └── Icon_512x512@2x.png
│   │   └── Contents.json
│   └── Credits.rtf
└── spec
    └── main_spec.rb
5 directories, 20 files
Let’s quickly have a look at these files and folders:
- Gemfile: In the Gemfile you specify any gems you would like to use in your app (using bundler). You can find Rubymotion gems here https://motion-toolbox.github.io
- README.md: A markdown file which describes your project. If you publish your project on Github the contents of this file will be rendered below your project files.
- Rakefile: This file contains build instructions and data about your app.
- app/app_delegate.rb: This file contains the code which is run by our application when it starts up.
- app/menu.rb: In this file the top menu of your application is defined.
- resources: This dir features the resources for our app, e.g. its icon in different sizes and the application credits.
- spec: In this dir you can place automated tests for your app. The tests are run with MacBacon
Structuring your project
Considering the default structure of a Rubymotion project, I would like to suggest three simple rules you should follow:
- Place your own ruby code in the
app/folder. - Place your resources like images, icons, localizations, immutable configuration/data files in the
resources/folder. - Place your tests in the
specfolder. - Bonus Rule: Place C/C++/Objective-C extensions in the vendor dir.
Well rule 4 is a bonus rule, because this is already a quite advanced topic. For the beginning the first three rules should be enough to remember. Let’s quickly discuss the rules:
- Rule 1: all
.rbfiles in theappfolder and all its subfolders are loaded and interpreted by Rubymotion automatically. I personally follow the principle of one file per class. Furthermore I name my files in ~camel~ snake case. Thus the classMyGreatSuperClasswill be put into a file namedmy_great_super_class.rb. This convention is also proposed by the Rubocop style guide - Rule 2: When building your app Rubymotion will take care to copy all the files in the
resourcesfolder into your application bundle to make them available for use in your app. - Rule 3: When running tests through Rubymotion (run the command
rake specto do so) it will look for tests in this dir. - Rule 4: Rubymotion will look for libraries in the vendor folder when extending your Rubymotion application.
So you see that Rubymotion takes care of quite many things automatically and it is really easy to get started with coding.
Translating between Objective-C/Swift and Rubymotion
In order to start building the GUI of our app we need to open the app/app_delegate.rb file:
class AppDelegate
  def applicationDidFinishLaunching(notification)
    buildMenu
    buildWindow
  end

  def buildWindow
    @mainWindow = NSWindow.alloc.initWithContentRect([[240, 180], [480, 360]],
      styleMask: NSTitledWindowMask|NSClosableWindowMask|NSMiniaturizableWindowMask|NSResizableWindowMask,
      backing: NSBackingStoreBuffered,
      defer: false)
    @mainWindow.title = NSBundle.mainBundle.infoDictionary['CFBundleName']
    @mainWindow.orderFrontRegardless
  end
end
If you are familiar with Ruby or any object-oriented language you will be able to see that we are defining a class called AppDelegate with the methods applicationDidFinishLaunching(notification) and buildWindow. The first method is like the entry point to our application. After the application did finish launching (well now you see where the name comes from) this method is called. Inside the function the methods buildMenu and buildWindow are called. We can see that the method buildWindow is defined below but where does buildMenucome from? Actually, buildMenu is defined in our file app/menu.rb and in order to not complicate things we will have a look at that later… when we will change the menu of our app.
Let’s focus on the buildWindowmethod for now and go through it step by step:
First our variable @mainWindow is initialized. As you might have guessed we are creating the applications main window here. We are calling the alloc method of the NSWindow class. This is actually the magic of Rubymotion: it gives you access to the macOS APIs through Ruby.
Secondly the property title of our @mainWindowobject is set and last the method @mainWindow.orderFrontRegardless is called on the object.
In the next step we are going to find out, what this code does.
Consulting Apple’s developer documentation
To understand what is happening in the code given above we need to read the Apple developer documentation. Let’s search for the alloc method name and we will get the following results:
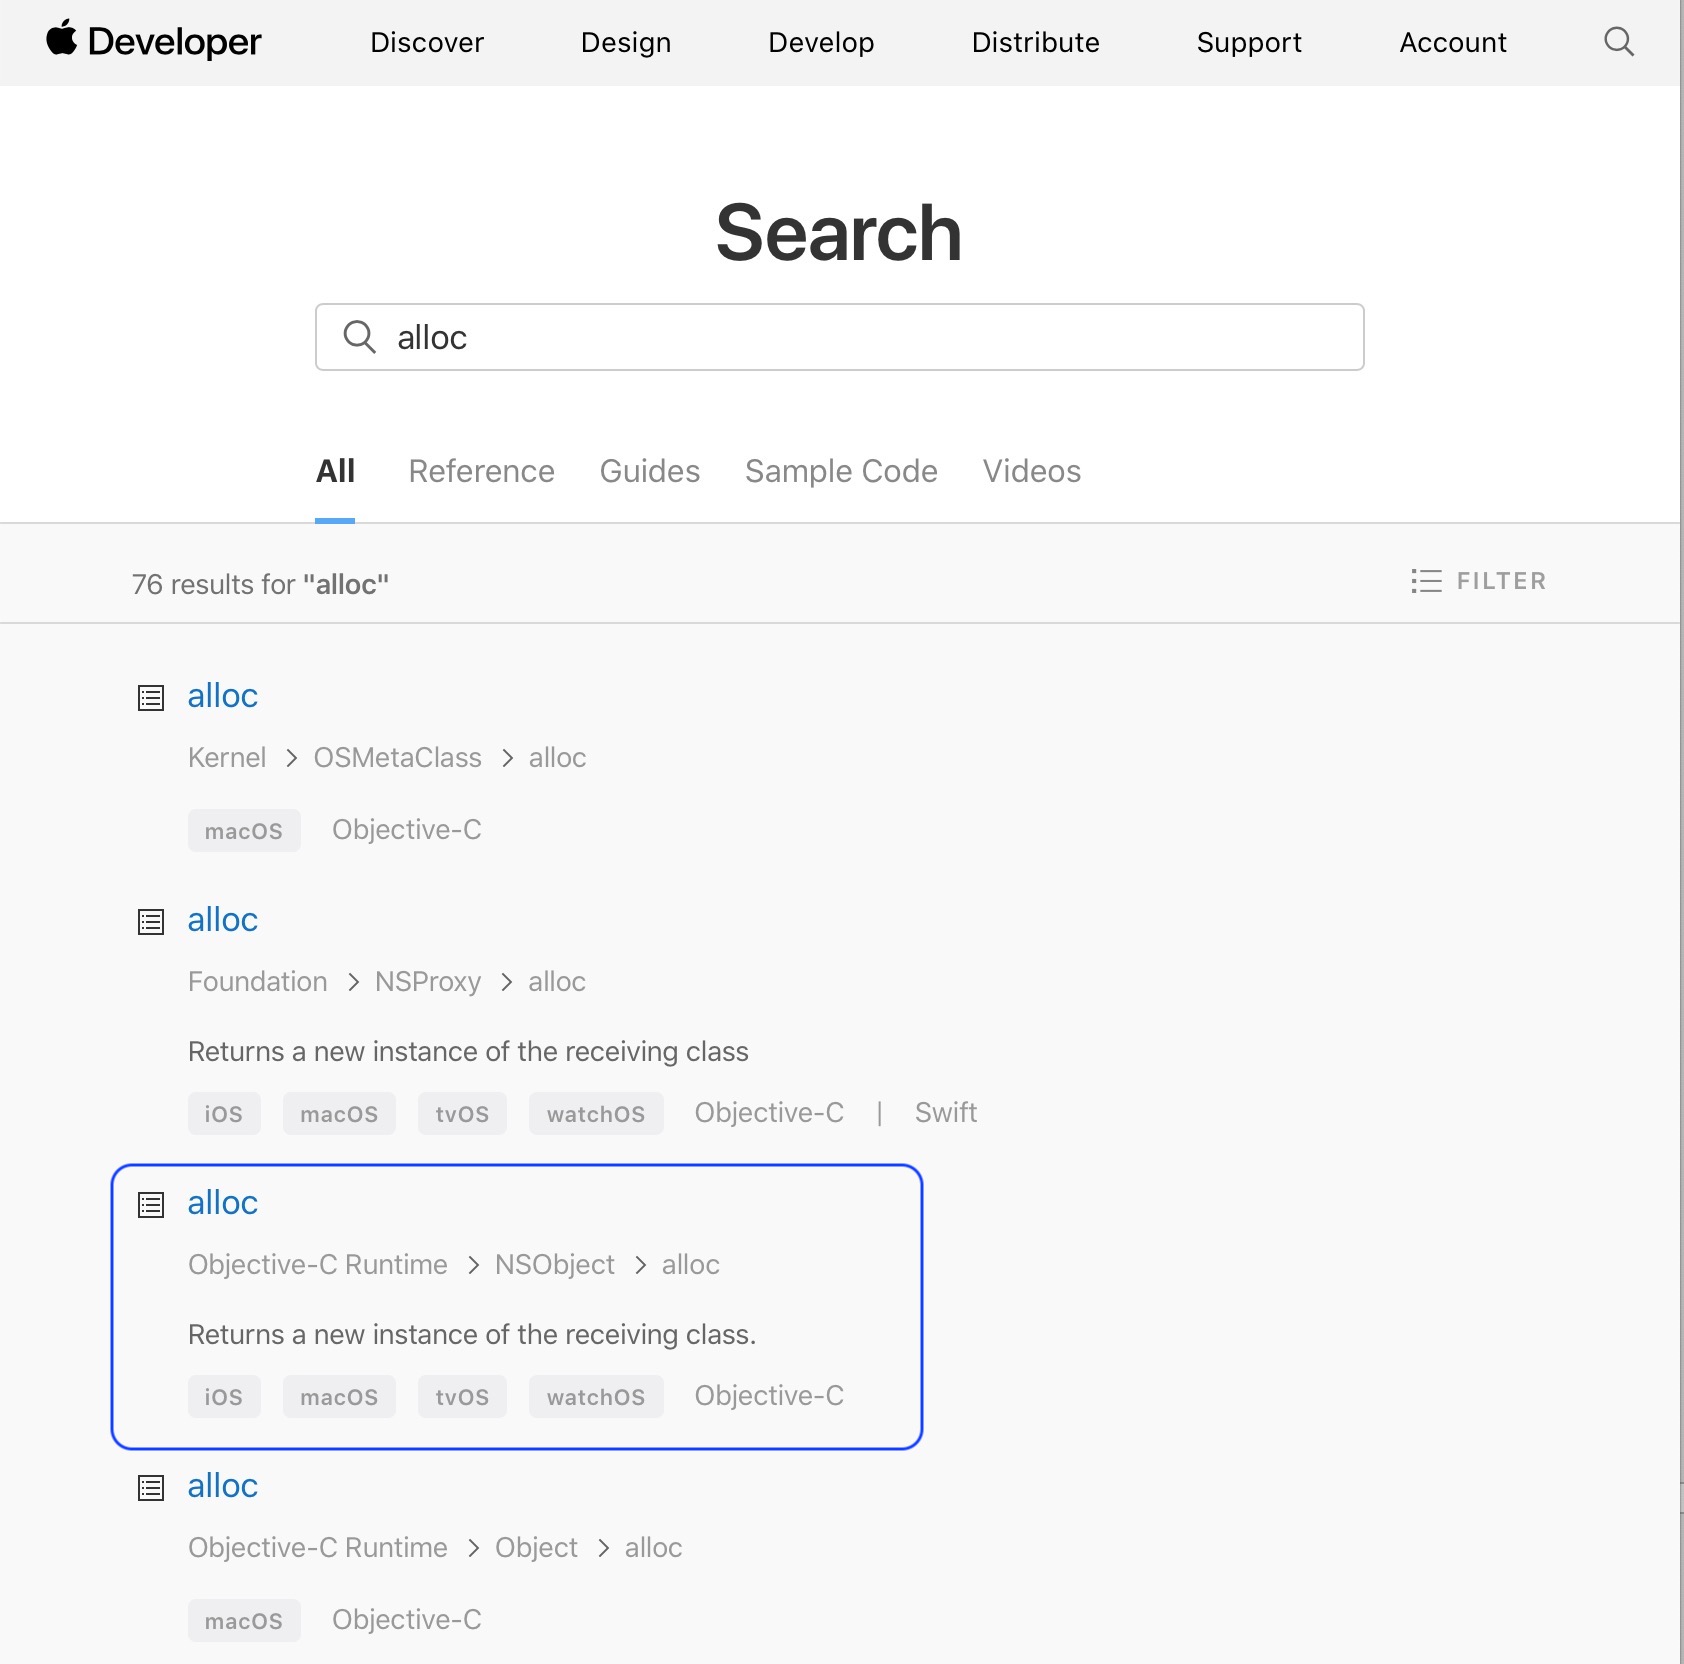
Let’s click on the Objective-C Runtime > NSObject > alloc method and we will get the description of what this method does:
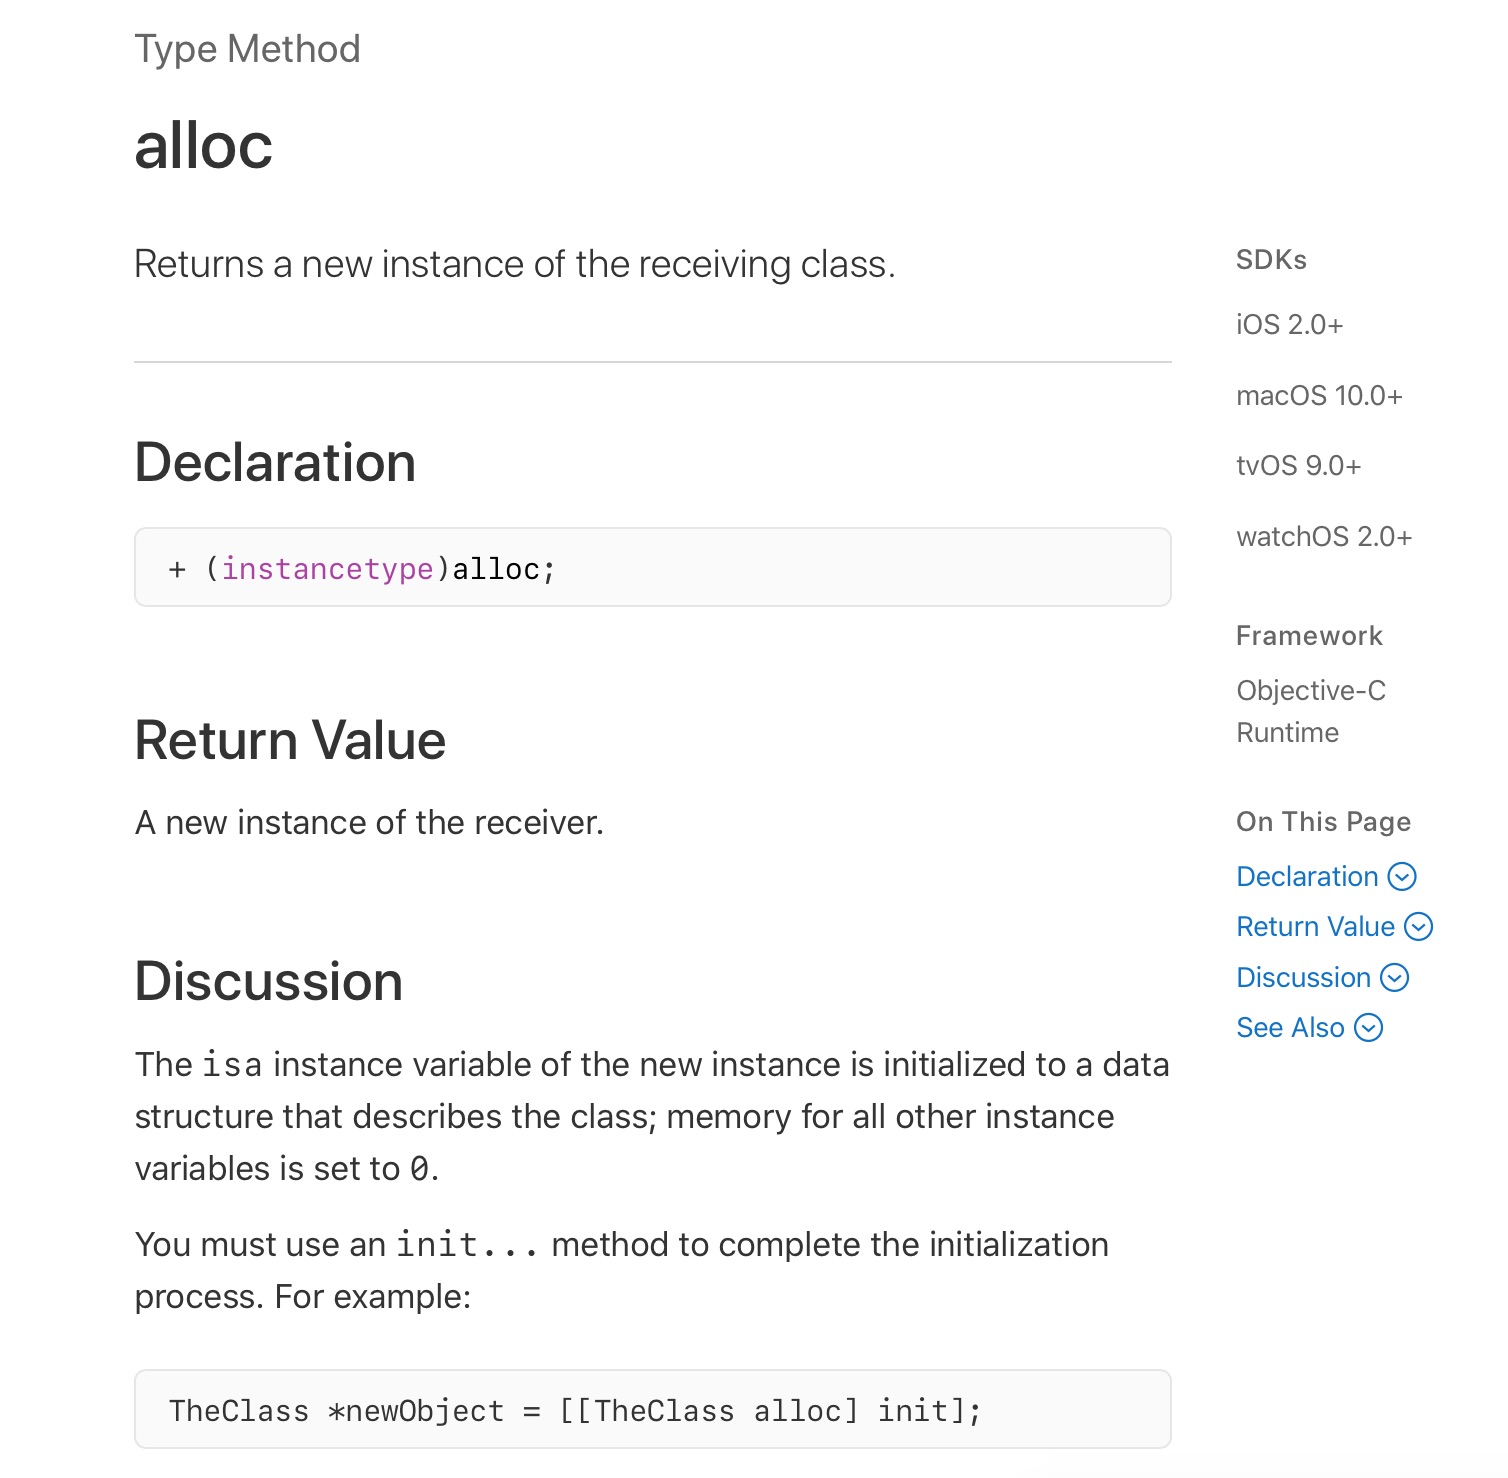
The documentation tells us that this method returns “A new instance of the receiver.” and “You must use an init… method to complete the initialization process. For example: TheClass *newObject = [[TheClass alloc] init];“.
Now this code example looks really strange, doesn’t it? Well that is because the example is written in Objective-C and not Ruby. This is really important: if you want to create macOS (and also iOS) apps in Rubymotion you must be able to understand Objective-C and/or Swift code, because you will need to translate the code examples from the documentation to Rubymotion code.
Switching languages in the documentation
To change between Objective-C and Swift in the documentation click on the disclosure triangle at the top of the page and then select your Objective-C as the language to display. For technical reasons the Objective-C examples will work better for translating to Rubymotion.

Translating Objective-C to Rubymotion
Objective-C method calls are written using square brackets. [TheClass alloc] means “call the alloc method of the TheClass class”. In Ruby we use dots for calling methods, like this: TheClass.alloc.
Method calls in Objective-C can be nested, like in the example from the developer documentation: [[TheClass alloc] init], which means “call the alloc method and then call the init method on the value returned by alloc”. In Ruby we nest method calls by adding a dot behind the first method call. So our example translates to: TheClass.alloc.init
Last, let’s have a look at assigning values to variables. In the original example this is done by writing TheClass *newObject = [[TheClass alloc] init];, meaning “the variable newObject is an instance of TheClass and let its value be the return value of [[TheClass alloc] init]”. As Objective-C is a statically typed language you must state which kind of value the variable has. Ruby, however, is a dynamically typed language, meaning that we do not need to specify the type of a variable. Also variables can change their types. Thus our translation to Rubymotion looks much cleaner than Objective-C: new_object = TheClass.alloc.init
Creating NSObject subclasses
Let’s look again at the documentation for the alloc method: “A new instance of the receiver.” and “You must use an init… method to complete the initialization process. For example: TheClass *newObject = [[TheClass alloc] init];“.
This is important to remember: when we are creating instances of NSObject subclasses we must usually call the alloc method followed by an init method. In our code from the default project the init method we are using is initWithContentRect of the NSWindow class.
Task
Search Apple’s documentation for the initWithContentRect method of the NSWindow class and read its description.
Answer
You should have arrived here
Calling methods with named arguments from Rubymotion
Let’s look at the documentation for the initWithContentRect method once again:
- (instancetype)initWithContentRect:(NSRect)contentRect styleMask:(NSWindowStyleMask)style backing:(NSBackingStoreType)backingStoreType defer:(BOOL)flag;
Let’s try to understand the meaning of this code:
- (instancetype)initWithContentRect: The method name is initWithContentRect and it returns a value of the type instancetype(NSRect)contentRect: The first argument must be an instance of NSRectstyleMask:(NSWindowStyleMask)style: The second argument is called styleMask and must be of type NSWindowStyleMaskbacking:(NSBackingStoreType)backingStoreType: The third argument is called backing and is of type NSBackingStoreTypedefer:(BOOL)flag: The fourth argument is called defer and is of type BOOL (which stands for boolean)
So we see that Objective-C uses named arguments in its method definitions. The problem is, that by default standard Ruby does not use named arguments. So the inventors of Rubymotion found the following workaround:
initWithContentRect(contentRect, styleMask:style, backing:backingStoreType, defer:flag)
Calling the method this way in Rubymotion has the same effect as the Objective-C code above. Isn’t the Rubymotion code much easier to read?
Task
Convert the following code examples from Objective-C into Rubymotion.
Example 1
[NSApplication sharedApplication];
Example 2
NSMenuItem *newMenu = [[NSMenuItem alloc] initWithTitle:@"New" action:NULL keyEquivalent:@""];
Example 3
  NSWindow* window = [NSWindow.alloc initWithContentRect: NSMakeRect(0, 0, 200, 200)
                           styleMask: NSWindowStyleMaskTitled
                             backing: NSBackingStoreBuffered
                               defer: NO];
Answers
Here is what you should have come up with:
Example 1
  # Get the property sharedApplication from the NSApplication class
  NSApplication.sharedApplication
Example 2
  # Get the property sharedApplication from the NSApplication class
  new_menu = NSMenuItem.alloc.initWithTitle("New", action:nil, keyEquivalent:"")
Example 3
  # Create a window with a given rectangle
  window = NSWindow.alloc.initWithContentRect(
    NSMakeRect(0, 0, 200, 200),
    styleMask: NSWindowStyleMaskTitled,
    backing: NSBackingStoreBuffered,
    defer: false
  )
An app for translating Objective-C to Rubymotion
Ben Sheldon created and published a Heroku app to translate Objective-C into Rubymotion: Just go here to test it: http://objc2rubymotion.herokuapp.com
Wrap-Up
So here is what you have done in this chapter:
- installed the Rubymotion toolchain
- created your first OS X Rubymotion project
- built and run your application for the first time
- analyzed the project folder
- learned how to translate Objective-C to Rubymotion
In the next chapter we will start creating our first basic GUI.
If you liked the tutorial or have any questions on it contact me via mail or also join the Rubymotion slack channel here: https://motioneers.herokuapp.com. Also check out my apps Docxtor and Gapped. Both were built using Rubymotion.